|
Should we
even explain importance of angle control?
When you finish
your edge, the angle the knife attacks the abrasive becomes very
critical.
1 degree too
steep and you'll be gouging the edge into the abrasive dulling it.
1 degree too
shallow and you'll be honing on the shoulder of the bevel, not the edge, honing
and honing to no effect on the burr.
Freehand sharpening has been shown to deviate within 3 degrees from the target angle; a coated blade tosses another challenge to freehand sharpening, and the angle control helps maintain crisp bevels.
We tried both
8" and 10" paper wheels, getting similar result.
But as our
workshop sharpens knives on the larger Tormek, we get better
results finishing on the 10" paper wheel as better matching the profile of
the edge ground on the T7/T8 grinding wheel.
10" paper wheels are run on an 8" grinder/buffer, while 8" paper wheels are run on 6" grinder - this gives room for your fingers on the knife handle over the grinder housing.
For honing we use slotted paper wheels. Typically, for mainstream knives one slotted paper wheel is with 5-micron diamond paste and another with a mix of 0.5 micron diamonds and chromium oxide. We use diamond paste because it covers all range of knife steels, including hard alloys.
Mounting
instructions
The support stand height is about 220-230 mm for a 10 wheel; for an 8 wheel it is 200 mm.
The support requires certain positioning in relation to your buffer/grinder.
For honing, mount it on your grinder bench to work away from the wheel.
With the support bar
inserted, align the bar with the grinder shaft (i.e. perpendicular to the
wheel), with the middle of the bar length against the wheel as shown
in the following photographs.
The support
bar must be positioned in parallel with the grinder shaft to the best of
your ability.
The distance AB between the grinder shaft centerline and
the bar centerline should be approx. 9 cm for 8" wheel, and 12.5 cm for
10" wheel. While parallel alignment of the grinder shaft and the
support bar is very important, the distance AB can be approximate at this
step.
Having
properly positioned the support, mark the holes, remove the bar, and fasten
the support to your grinder bench with screws.
Operation
Clamp the
knife in the Tormek Knife Jig as described in the Tormek handbook.
Set the edge honing/grinding
angle by either:
- Tormek AngleMaster;
- Marker
method;
- or for
ultimate sharpness, use our computer software Angle Setter for Bench Grinder (for Mac Angle Setter for Bench Buffer).
Angle is
changed by elevating/lowering the support bar, fine-tuned with the support
micro-adjust wheel.
Fix the bar
position with the black locking screws at the base.
On the
photographs below is AngleMaster set for 30 degrees edge angle (included),
on the left photo for 8" wheel, and right for 10".
Make sure
that you press your thumb on the knife jig so that the jig is always pressed
against the bar during operation.
Ensure the
jig slides on the Universal Support perpendicular to the wheel and the
blade is not shifting forward/backwards.
Dont neglect
safety glasses.
Move the
knife over the wheel with light pressure just enough to
maintain continuous contact of the blade with the wheel. Ensure that the
blade is in contact with the entire width of the wheel; near the tip
raise the knife handle following the taper.
Half-speed buffer/grinder is recommended.
To prevent
edge burning at high RPM:
Use slotted wheels and a half-speed grinder/buffer;
Now and then clean the wheel slots with a thread or floss;
When using
diamonds for honing, use oil-based diamond pastes rather than sprays;
Use our Honing Cooler;
Pull the blade across the wheel at a feed rate of approximately 5cm per 1 second on a half-speed speed grinder/buffer, and 10cm per sec on full speed - not slower! Better do two quick passes than one slow.
Using the
computer applet to set honing/grinding angle
Having
mounted the supports next to your grinder or buffer, you have to take the
following measurements in mm:
-
Wheel diameter.
-
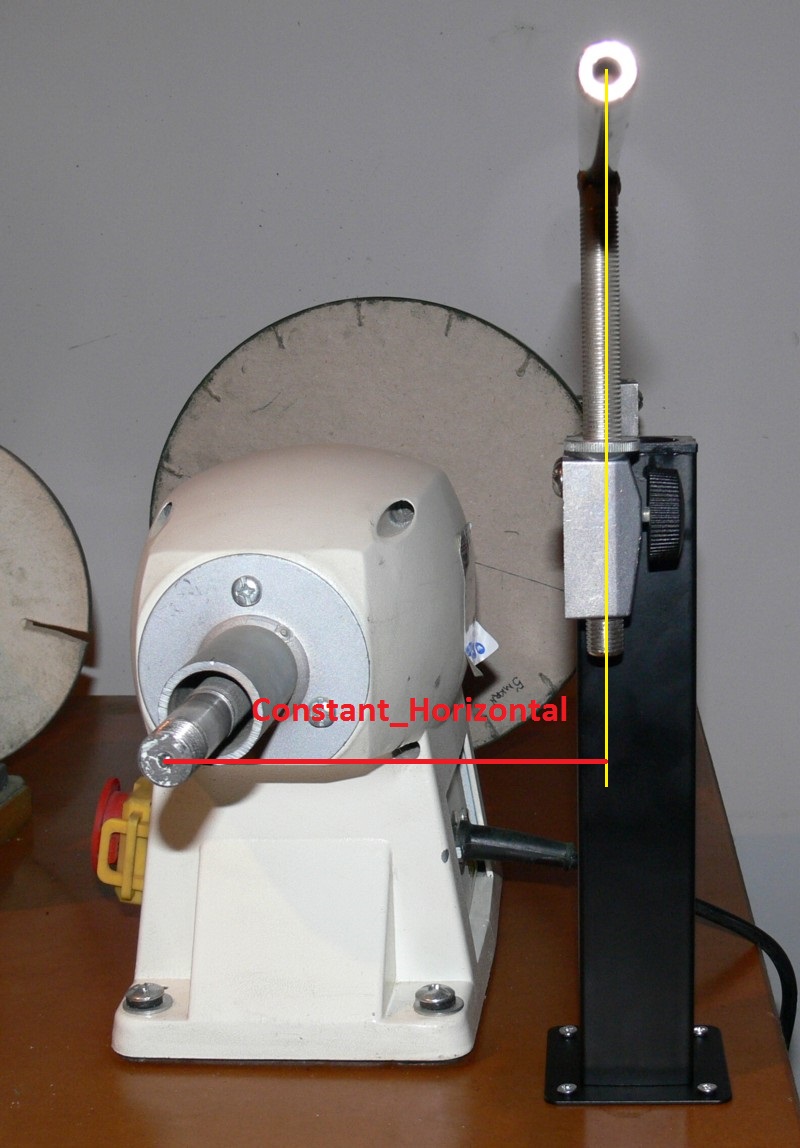
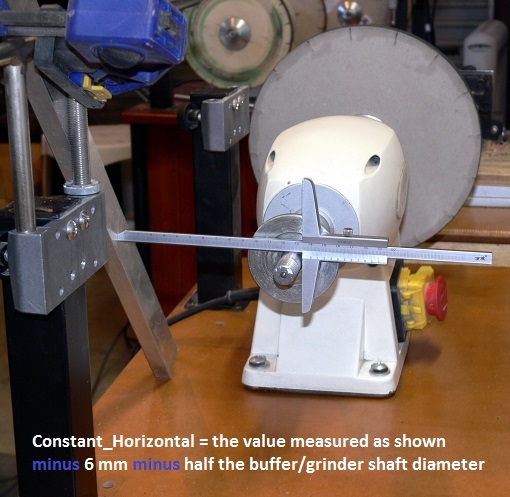
Constant_Horizontal horizontal distance between the grinder shaft centerline and the bar
centerline. Recommended distance is 90 mm for 8" paper wheel, and 125 mm
for 10" paper wheel, but you must measure the actual distance of your
setup in mm.
-
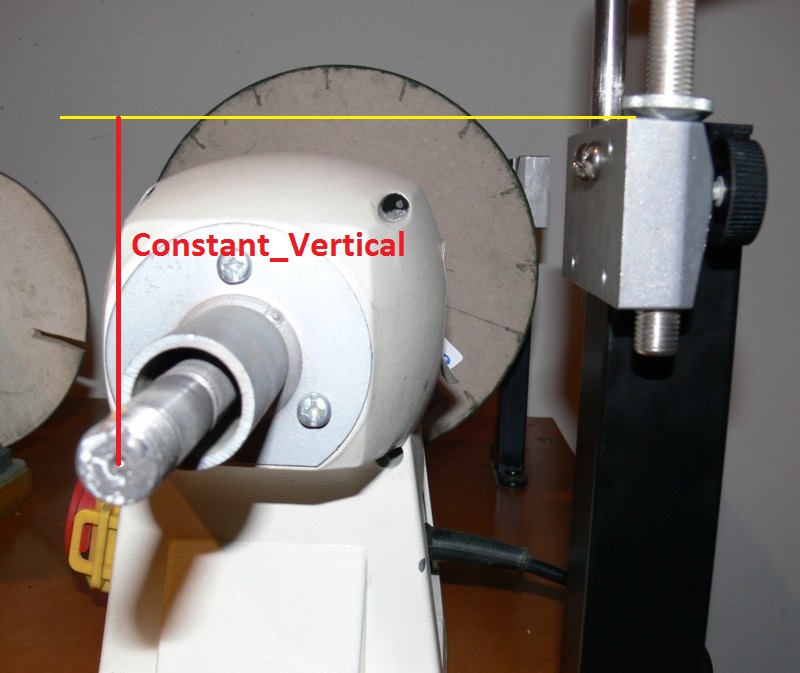
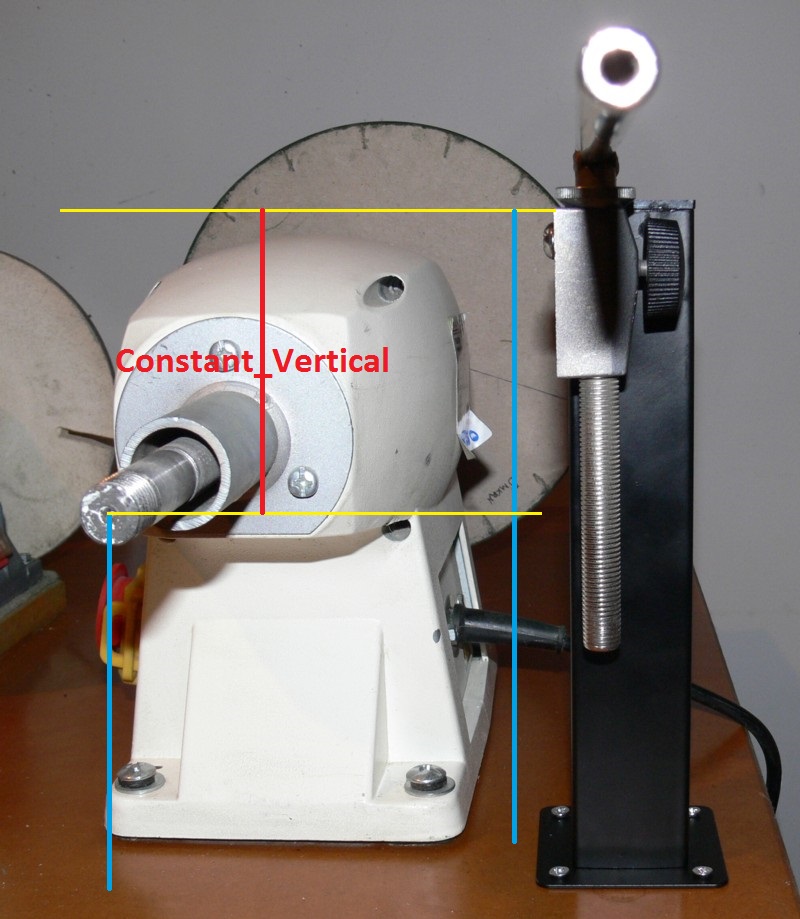
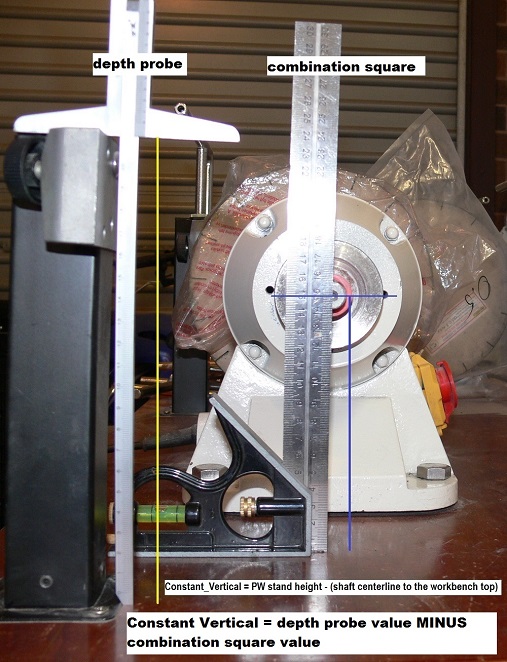
Constant_Vertical vertical distance between the center of the grinder shaft, and the top
of the support stand.
It is the same as the difference between the support stand height, and the
vertical distance from the center of the grinder shaft down to the bench.
The support stand height is about 220-230 mm for a 10 wheel; for an 8 wheel it is 200 mm you have to measure the actual height.
So for a 10 wheel the Constant_Vertical = 230 minus [vertical
distance from the center of your grinder shaft down to the bench].
These
measurements you do only once, to tune the applet to your particular
setup.
|
|
|
|
|
|
|
See how we measure the Constant_Horizontal and Constant_Vertical; must be done for each side, because distances are not the same on the left and right even in the best buffer/grinder.
|
Click the
Edit button to edit the constants in the applet with your measured values, and click the same button to save you
have to do it just once.
Measure the actual Wheel Diameter in mm.
Jig Distance
Having
mounted the knife in the knife jig, measure distance between the knife
jig adjustable stop (the flat black plastic part) and the knife edge in mm you will need this value
for the applet.
Blade
thickness behind the edge
For honing, measure at the edge bevel to a fraction of mm, using callipers or micrometre.
Select your grinder, left or right wheel, enter the wheel diameter, jig distance and the target honing/grinding angle, and press the Calculate button.
For your target honing/grinding angle, the applet will give you the support bar height as a vertical distance from the top of the bar to the top of the support stand.
Using the
support micro-adjust wheel, set the bar height with the help of a calliper
depth probe as shown below, and lock position with the black locking
screws.
Buy software Angle Setter for Bench Grinder >
|